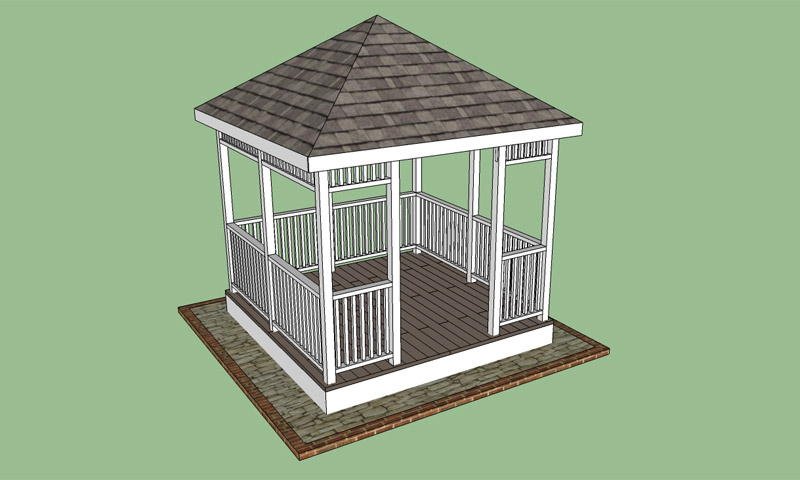
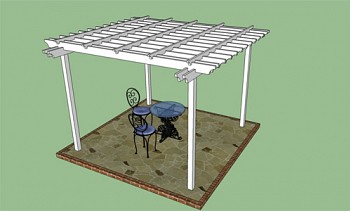
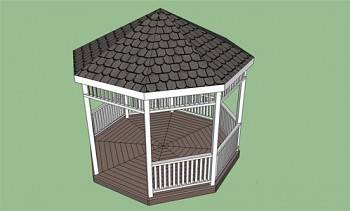
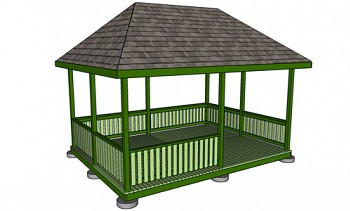
This article is about how to build a gazebo with your own hands from wood. If you have a large garden and you want to have a good time there with family and friends, the gazebo is ideal for this. Just imagine yourself in a beautiful gazebo built by your own hands, watching your children play nearby on the grass. In addition, the gazebo is a great place for a family dinner together. On hot summer days, it will protect you from the scorching sun and serve as a cozy place for privacy with your favorite book.

Content:
Necessary materials and tools
Building a gazebo is not difficult, provided that you use the right materials and you have a plan ready. In order for the gazebo to fully meet your tastes and needs, you must responsibly approach the planning and design process. You must decide in advance what its dimensions should be, whether you want to lay the floor here, install the brazier. There are many options, so we recommend that you spend some time planning. However, it should be remembered that each additional function implies additional costs, so here it is necessary to maintain a balance between your desires and capabilities.
At the preparatory stage, you should decide on the design of your future gazebo. There are also many options here: it can be, for example, an octagonal design or a fairly simple square one. In this step-by-step guide, we will show you how to create your own gazebo in just a couple of days off, without spending too much money. Building a wooden gazebo is a simple task, provided that you are familiar with the basics of woodworking.
To build a gazebo, you need the following:
| Materials | Tools |
|---|---|
| A - Concrete support (foundation): tubular formwork (4 pieces), adjustable anchors (4 pieces); | Circular saw, angle saw; |
| B - The perimeter of the floor battens (lower trim): a 5x15 cm timber 300 cm long (2 pieces), a 5x15 cm timber 307.5 cm long (2 pieces); | Drill and drill; |
| C - The middle beam of the floor frame: beam 5x15 cm 300 cm long (1 piece); | Hammer, level, carpentry pencil, tape measure; |
| D - Floor logs: timber 5x15 cm, length 148.5 cm (16 pieces); | Drill for digging pits under the pillars; |
| E - Spacers for floor logs: timber 5x15 cm 36.5 cm long (18 pieces); | Stairs; |
| F - Wooden racks: beam 10 × 10 cm, length 270 cm (9 pieces); | Protective gloves, glasses. |
| G - Upper harness: timber 10x10 cm 300 cm long (4 pieces); | |
| H - Corner rafters: a beam of 5x10 cm 255 cm long with ends sawn off at an angle of 64º (4 pieces); | |
| I - Auxiliary rafter legs: a 5x10 cm timber 197.5 cm long with ends sawn off at an angle of 55 ° (4 pieces); | |
| J - Scaffolds (short rafter legs): a beam of 5x10 cm 105 cm long (8 pieces); | |
| K - Roofing sheets: 12 mm plywood, 18 sq.m; | |
| L - Roofing insulation: roofing material, 18 sq.m; | |
| M - Tiles: shingles, 18 sq.m; | |
| N - Flooring, 10 sq.m; | |
| O - Decorative fences: lower and upper railing 5 × 10 cm; balusters 5 × 5 cm; | |
| cement, sand, gravel; | |
| 6 cm square head screws for securing racks; | |
| 10 cm screws for attaching the bars (rafters, rails, etc.); | |
| Metal corners (angle brackets) for fastening the bars; | |
| 6 cm self-tapping screws for fixing floor boards, balusters, roofing sheets, etc .; | |
| 15 cm screws for attaching rafters; | |
| 1 cm roofing nails. |
DIY construction of a gazebo made of wood is a rather complicated project, but even an amateur will be able to cope with this task if he uses a correctly drawn up plan and suitable materials and tools. You have to install several racks, lay the floor, make a roof and railings. At first glance, this may seem very difficult, but do not be scared: to achieve the goal, you should follow our step-by-step instructions and be very careful in your work.
Tip: At the very beginning, calculate the amount of materials you need, otherwise you will spend a lot of time endlessly going to the hardware store. Make sure that the power tools you use are in good condition and their blades are sharp enough.
The construction of the base of the square arbor
Before you begin, you must select a flat area for construction and designate the perimeter of the future gazebo with pegs and rope.
Tip: Measure the diagonals of the square - they should be equal. Check each angle for perpendicularity, applying the well-known rule “3-4-5” (according to the theorem that everyone remembers well from school, the hypotenuse of a right triangle with legs 3 m and 4 m should be 5 m (32 + 42 = 52)) .
There are several ways to fix wooden racks, most often they are fixed with concrete or metal products. If you want to install the racks in concrete, you must dig holes 60-90 cm deep in the ground, fill up and tamp a 5 cm layer of sand or gravel and pour 10 cm a layer of concrete. After that, place each rack in the hole and, using a plumb line or level, set it perfectly upright.
After vertically aligning the wooden posts, fasten them in two directions, otherwise they may shift.

Methods of fixing the rack in concrete.
Alternatively, you can place a tubular formwork (a large piece of pipe) into the excavated hole and fill it with concrete. When the concrete has hardened a bit, adjustable anchors should be replaced, making sure they are perfectly aligned with each other.
Tip: When installing the racks, you must align them properly so that the square they form is perfect.

Vertical alignment of the rack.
Use a ruler and level to make sure that the four concrete supports are perfectly aligned. Let the concrete dry for at least 48 hours before installing the racks.
Tip: Support the racks before attaching them with bolts / screws. Use an alcohol level to make sure they are upright and aligned.
To create a floor frame, use wooden blocks of 5 × 15 cm. Logs must be laid every ~ 40 cm, so that the structure is sufficiently rigid and can support the weight of the flooring.
Tip: When installing the floor battens, use the level: you must be sure that the logs are placed strictly horizontally.
For fixing lags inside a wooden frame, you have two options. You can screw 10-12 cm screws into the end of each lag through the lower strand perpendicular to them, or use metal corners (clamps for attaching the ends of wooden beams).
We recommend you the second option, however, if you wish, you can use the first, but before screwing in the screws, remember to drill the guide holes.
Now it’s the turn to install the remaining racks that will support the upper harness and the roof. If you want to build a solid structure, we recommend that you fix the racks on the logs using 15 cm nails.
Tip: Do not forget to vertically align the posts with a plumb line before mounting. Roulette will help you place your bearings symmetrically.

Installation of additional racks.
After you have created the floor crate and installed the wooden racks, it is time to lay the floor. We recommend that you buy floorboards designed for outdoor use for this purpose, otherwise the floor of the gazebo will soon become unusable under the influence of atmospheric moisture.
We strongly recommend that you drill holes before driving in nails. If you use self-tapping screws, you can screw them in without preliminary drilling.
Tip: Each floor board should be fixed with two screws at each end.
How to make a gazebo roof
There are several ways to make a gazebo roof. We will show you an option that, firstly, does not require a large amount of materials and, secondly, makes the gazebo durable.
The first step in the process is to install the upper trim of the wooden posts. Use 10 × 10 cm bars for these purposes.
In the presented figure, you can see the correct technique for fastening the bars. At the ends of each bar, it is necessary to make L-shaped cuts and connect them together at the top of the uprights. After that, drill the guide holes and drive in 15 cm nails.
Tip: We recommend that you use solid bars for strapping, otherwise the rigidity of the structure will significantly decrease.
Now you can begin to install the roof frame. To begin, cut the supporting bars of the truss truss and fix them in pairs in place, hammering the nail at an angle. Even if you wanted to build a wooden gazebo exclusively with your own hands, at this stage you can not do without an assistant.
Tip: When installing the rafters, you will need a ladder. Make sure you stabilize it.

Construction of the roof of the gazebo.
Then install the auxiliary rafters as shown. Make sure you position them symmetrically. Fix them on the upper harness and on the main rafters with 10 cm screws.
Tip: You can change the size and height of the gazebo to fit your needs and tastes.

Installation of the roof of the gazebo.
The roof of the gazebo can be done in several ways: you can use, for example, wooden boards or large sheets of plywood for these purposes. Regardless of your choice, we recommend screwing screws along the rafters every 25 cm to fasten the roof material.
Tip: Using boards as roofing material will require more time and labor of a qualified worker.
The surface of the roofing material (wooden boards or plywood sheets) must be covered with roofing material, and then with bituminous tiles, wooden shingle or metal sheets.
Our experience shows that the costs in all these cases are commensurate, so you should choose the option that suits your needs and tastes. Working with great care, make sure that the nails do not damage the roof (use 1 cm roofing nails).
How to make a gazebo fence
The last, but no less important than all previous, stage of work is the creation of fencing. There are many design options for balusters, here you should focus solely on your taste.
Usually balusters with a height of 70-80 cm are used, but you can adjust this value according to your needs.
The lower and upper horizontal bars of the fence must be fixed with self-tapping screws screwed at an angle, or using metal angles.
Tip: Do not drive nails into the ends of the balusters through the railing, it is better to use hidden connections, for example, dowels (pins) to fasten the fence elements.
Similarly, you can make the upper border. As below, use there 10 cm wide boards for the lower and upper trim and 5 × 5 cm bars for balusters. Make sure that the decorative fence you created has a neat appearance and its design matches the style of your entire gazebo.

Finishing the top of the gazebo.
Once again, look critically at the gazebo. Fill cracks and holes with wood putty. Sand all wood surfaces with medium grit sandpaper. Protect all wooden structural elements from moisture, covering them with several layers of varnish.
In order for the gazebo you created to perfectly match your needs and tastes, do not follow thoughtlessly someone else's advice.From the very beginning, choose a design and size that suits you.


