Do-it-yourself children's sandbox? There is nothing easier. I’ll tell you how this little source of great joy appeared near our house. One Saturday, my wife told me: “We are making a sandbox for children!” Well then. Good.

We searched the entire Internet in search of step-by-step instructions, but did not find anything worthy. We decided to act at our own peril and risk, and this is what we got ...
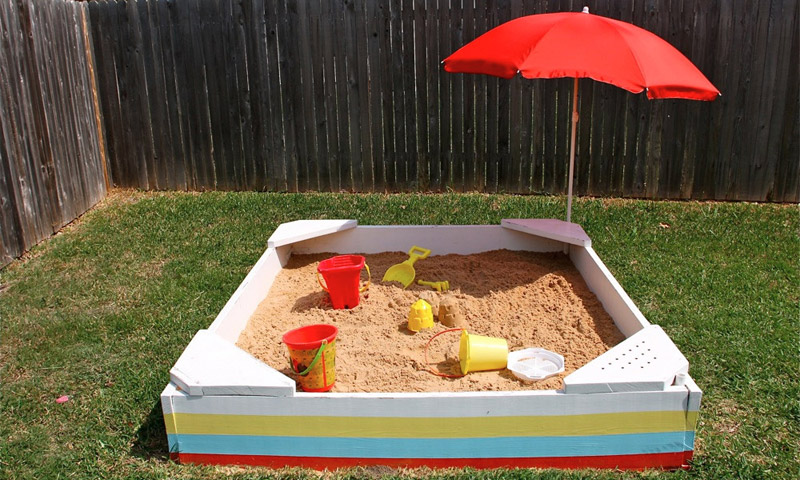
A simple brightly colored sandbox in which there are benches for sitting with holes so that sand does not accumulate on them, two places for attaching a beach umbrella and, of course, a lot of sand.
Oh yes, and two happy children.
Sandbox construction scheme and preparation
Do you also want to make a sandbox for your children? This is actually pretty easy. The process of building a sandbox is somewhat similar to creating a flowerbed. We are not carpenters. If you are a specialist in woodworking, you will certainly be able to give the best advice on the design concept and the right choice of materials. I will show you what we did, having only basic skills in the field of repair and construction. And they will accompany my step-by-step instructions for building a sandbox for children with my own hands, numerous photos, one glance at which will be enough to understand how and what to do.
Here is our sandbox construction scheme and some explanations for it:

1. The sandbox is a 180 by 210 cm rectangle.
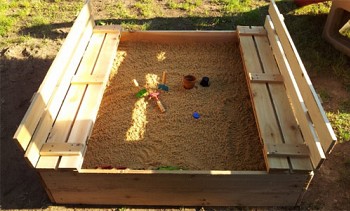
2. The bottom is made of wooden planks that mesh with each other.
3. From the scraps of boards in 4 corners we made seats (ideal for mom and dad).
4. In two corners we placed pieces of PVC pipe to secure the beach umbrella.
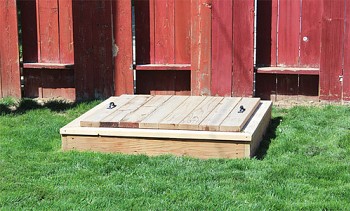
5. You can additionally make a cover for the sandbox. We in our area have never had problems with stray cats who would use the sandbox as a toilet, but for many people this issue is relevant.
Choose a place suitable for the sandbox in your yard. We preferred a flat area in the corner of the courtyard, near the fence. Prepare the site, clean it of turf.
Decide on the design and size of the sandbox. Get the necessary materials. We bought long 3-meter boards (about 2.5–3 cm thick). Trimming boards were used to create benches.
Saw off the fragments of the boards necessary to create the frame of the sandbox length. Use a hacksaw or circular saw for this. Do not forget about safety glasses!
Sandbox making
Build a sandbox frame. It’s not at all difficult ... just assemble a 180 x 210 cm rectangular frame from sawn fragments and fasten the boards with nails or screws.
Make the bottom of the sandbox.
Note: The bottom is not an obligatory element of the sandbox, but without it, your structure can become shaky and deformed over time. In addition, weeds may begin to grow inside the box. On the other hand, the bottom quickly becomes unusable under the influence of atmospheric moisture, since the floor often gets wet in the rain and there is almost no chance of it completely dry. After weighing all the pros and cons, we decided in favor of installing the bottom of the sandbox.
To create the bottom, we used a lining - wooden boards, interlocked with each other. They are more expensive than usual, but working with them is much more convenient.
The frame and the bottom are ready, you can start creating benches! They not only serve for sitting and relaxing, but also give additional strength to the frame.
Take the trim of the boards and cut out the fragments, marking directly in place (in the corners of the frame). Remember to sand rough edges and surfaces.
Several holes can be drilled in the bottom to allow rainwater to drain. How necessary is a moot point. But we think that it will still be useful: at least part of the water that has fallen into the sand is absorbed into the ground.
Well, well, you did a good job. As a result, you should get a design like the one you see in the photo.
Note: we took this photo in the garage, where we brought our still unfinished sandbox, saving it from the rain. We planned to cover the wooden surfaces with a layer of sealant, but later, after a little reflection, we decided that this was not necessary. Paint alone is the best way to protect wooden garden buildings.
One final touch ... Fix in the corners short pieces of PVC pipe, into which you can subsequently insert a beach umbrella to protect from the scorching sun. It was my wife’s idea, and I think she’s brilliant. We drilled a hole in the bottom of the sandbox to place the pipe. She stood tight in the corner between the bench and the side of the sandbox. If your beach umbrella is larger than ours, you will need a pipe of a larger diameter.
Painting all sandbox elements
And now he will move on to the really fascinating part of the work ... Painting.
For the sandbox, I chose the colors in which our house is painted - red, yellow and blue.
To begin, paint the inner walls of the sandbox with white paint.
Before painting the sandbox outside, lift it up, propping it with trimmed boards. If you do not, the brush will quickly smear in the ground, and the result of your work will not look so neat. But do not lift the sandbox when painting it from the inside, because in doing so you will have to stand inside the box!
Paint the benches and the outer walls of the sandbox with white paint.
Decide how many color bars you want to make around the outside perimeter of the box, and calculate their width.
Use masking tape so that the borders of the stripes are flat and neat. Start painting from the bottom strip. Let the paint dry for 6-8 hours, then remove the tape.
In a similar way, paint a strip of the second color, then the third, etc. (we recommend leaving the upper band white).
And finally, when the paint dries, fill in the sand. To create a good volume, you will need 20-30 bags.
But no matter how much sand you fall asleep, you and your children are guaranteed a lot of pleasure ... especially when it gets wet to the ideal consistency for building sand castles.
Enjoy it! Rejoice at looking at your happy children and realizing that you made this sandbox with your own hands!


