Once I realized that in my house there was not enough one more bed, on which it would be possible to place a relative who had arrived to stay or a friend who had stayed up late. Instead of buying new furniture, I decided to make it myself.
Essential tools, materials and bed design
How to make a single bed with your own hands? It is not as difficult as you might think. I did the job in just one day. It should be borne in mind that, due to a number of circumstances, I didn’t have so many tools at hand - a table saw, a hand drill, a small electric planer and a belt grinder.
The main (but not the only) material during the implementation of my project was 5x10 cm boards, and I preferred coniferous wood. In addition, I needed three boards 5x20 cm, one 5x15 cm, one 5x25 cm and, finally, two 5x5 cm bars (the length of all lumber is 240 cm).
A few words about the design of the bed ... On the inner side of the side rails, 5x5 cm bars are attached, and a rack bottom supporting the mattress rests on them. To better understand the above, take a look at the figure illustrating the cross section of the bed.

When using building lumber for furniture manufacturing, you should choose them very carefully. But the frame of our bed, fortunately, is so heavy and durable that a slight deformation of the board is not terrible - this defect will be easily fixed when assembling the structure.
Although construction lumber is delivered planed, the quality of their pre-sale processing is not enough for furniture projects. Since, as I already said, I temporarily lost some of my tools, including a planer and a jointer, the electric planer turned out to be the most suitable for my needs. In one pass, he chooses a width of no more than 7-8 cm, so several parallel passes are required to process wider boards. As a result, on some boards there were small irregularities between the “paths”, which, however, I easily eliminated with the help of a grinding machine.
On all open edges, I made a 6 mm chamfer, cutting off the corner of the boards at an angle of 45 degrees. All the same electric plane helped me round the edges. I did chamfers at the ends of the boards manually, using an ordinary sharp knife.
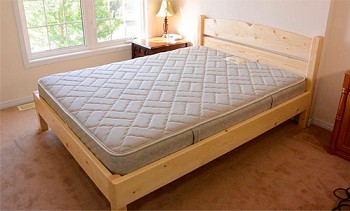
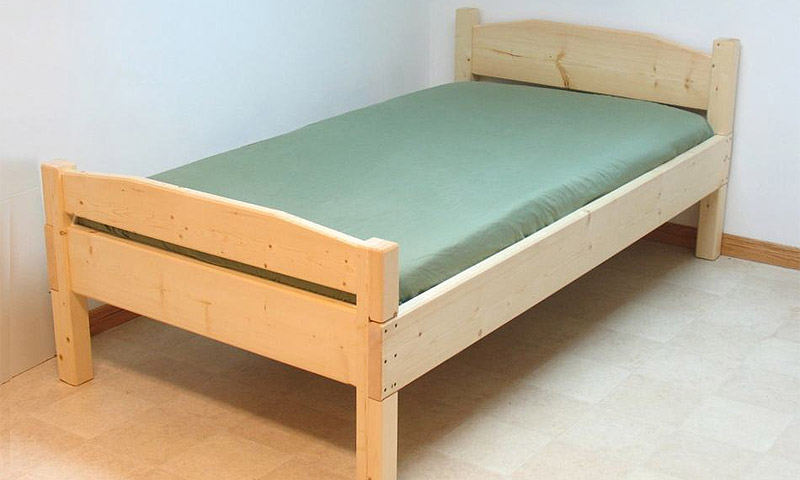
Now a few words about the design of the bed. It consists of two backs connected by side rails. The legs are made of two adjacent 5x15 cm boards with a recess for attaching the sidewalls. I hope that the accompanying photographs and drawings of the self-made single bed made of wood will help you better understand what and how to do it.
Initially, I planned to give the backs smooth bends, but since at the time of the construction of the bed I was temporarily deprived of my band saw, I only had to make straight bevels.

Single bed assembly
The horizontal elements of the backs are connected to the legs by 15 mm with wooden furniture pins. In this case, only one (internal) of the two 5x15 cm boards forming the leg is involved. Before drilling holes for the pins, I firmly fixed both fastened elements with clamps and drilled both parts at once. This ensures that the holes are exactly opposite each other, any deviations are excluded.
The diagram presented here shows how to connect parts for drilling holes for pins.
The widest board I used to make the headboard at the head of the bed was slightly curved, but when I clamped it with clamps to drill holes, it straightened.After assembling the structure, the pins attached to the glue continue to hold the deformed board in a straight state.

After driving the pins, I found that there was a slight gap between the horizontal boards of the back and the legs of the bed.
I did not have enough large clamps that could cover the width of the bed, so I pressed two small bars to a horizontal board and used these bars to draw elements to each other. Both clamps in this case are tightened very tight, so if you encounter a similar problem, I recommend that you use only metal clamps that are tightened with a screw.
If such a solution to the problem seems too complicated for you, you can make it easier - use screws instead of 10 cm pins. The design will turn out not so reliable, but still strong enough, and most importantly, when tightening the screws, gaps are eliminated.
After joining the headboard back to the inner halves of the legs, I sanded the surfaces with an electric planer, and then put the second, external, parts of the legs onto the glue.
This stage of work is not as simple as it might seem at first, because applying a large amount of glue will cause the parts to be bonded when clamped in clamps will begin to “float”, i.e. shift relative to each other. One clip, as shown in the photo, is placed perpendicular to everything else, which allows you to better fix the details.
Despite all my efforts, a final shift of 1 mm was still observed in the final. However, such an insignificant marriage is easily nullified by grinding. At the same time, I smoothed the corners of the legs with an electric planer. On their inner side (near the back) I could not use a power tool, I had to smooth the corners by hand, with an ordinary plane.
To make the side railings of the bed, I used 5x20 cm boards 240 cm long, which I cut to 200 cm long and 17.5 cm wide. With the help of glue and screws, I attached a 5x5 cm block to the lower inner edge of each board, and every 15 cm I glued small wooden blocks on it to prevent the bottom rails from moving.
Finally, the finished side rails are fixed at their designated places in special cutouts of the legs. I used six 65 mm screws at each end of the board. For these purposes, they are a bit short, but there were simply no others at hand.
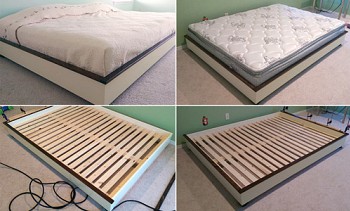
And now the bed frame, finally assembled, it remains to lay the rack bottom. Ironically, the slats I used were once, a long time ago, removed during the analysis of an old bed with a spring mattress. (I'm not a big fan of spring mattresses. In my opinion, it is much more convenient when the mattress is laid on the river bottom - this creates a lot of space under the bed for storing different things.)
I am pleased that the self-made single bed turned out to be so strong and reliable, and I spent so little time creating it.


